

Photo to 3D Challenge – Recreating Real Car Photography in 3D
This project began as a fun experiment that quickly became one of my favorite challenges so far — the Photo to 3D Challenge. I came across a few incredible car shots on Instagram and decided to recreate them entirely in 3D. My goal was simple: to test how closely I could match real-world lighting, composition, and materials using my 3D workflow.

The first reference image featured a sleek black car parked under an overpass — perfect for testing light reflections and shadow depth. I started by blocking out the environment, focusing on getting the overall geometry and scale right before placing the car. Recreating the lighting was the biggest challenge here, as I wanted to achieve the same soft ambient feel that the photo had.

Next, I modeled and positioned the vehicle to match the perspective of the reference image. Using a combination of HDR lighting and manual light tweaks, I worked to bring out realistic reflections on the car’s body. This stage was all about fine-tuning — getting the balance between light intensity and surface gloss just right to mimic the real photo’s mood.
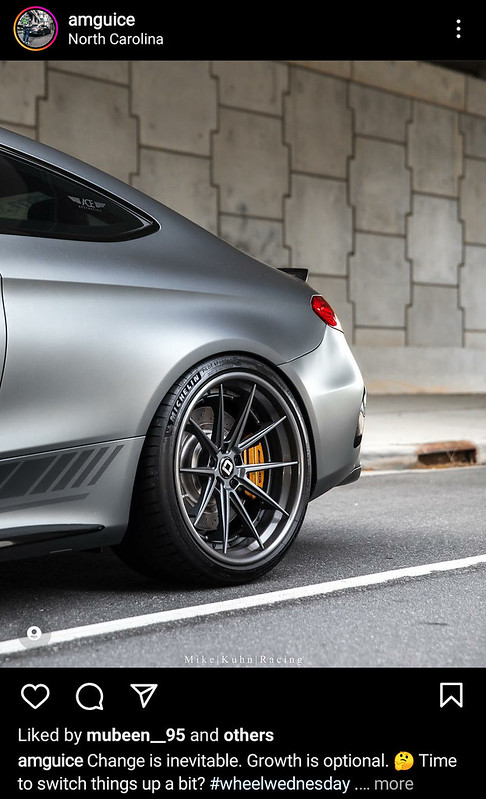
The next reference came from another striking Instagram post — a wheel detailing. I loved how the highlights played across the paint, and I wanted to capture that energy. For this shot, I adjusted my 3D lighting setup to emphasize contrast and warmth, creating that late-afternoon glow that makes metallic surfaces feel alive.

I focused on the wheel detailing and subtle ground reflections. The goal was to push realism even further by matching how real rubber, metal, and pavement interact with light. I learned that the smallest adjustments — like tweaking roughness maps or changing camera FOV — can make a massive difference in realism.

For another scene, I switched to a bright, green car render inspired by an energetic, daylight-heavy reference. This was a great exercise in balancing exposure and material brightness. It was also a test in making sure the car’s vivid color stayed believable under strong sunlight without losing depth or realism.

When I compared my render to the real photograph, I realized how powerful small imperfections can be. Adding subtle noise, chromatic aberration, and camera grain made the scene feel more “real.” Sometimes, perfection isn’t the goal — it’s those tiny, imperfect details that make CG feel like photography.

For the next image, I experimented with different post-process effects and camera focal lengths. The challenge was not just copying a reference but learning why certain compositions work. I studied how photographers use leading lines and background blur to direct attention — and I applied those same techniques in 3D.

In another render, I focused on replicating natural lighting behavior under an overpass, where light bounces off concrete and creates soft fill shadows. It was a great exercise in environment lighting and reflection control — the kind of detail that separates an okay render from a photorealistic one.
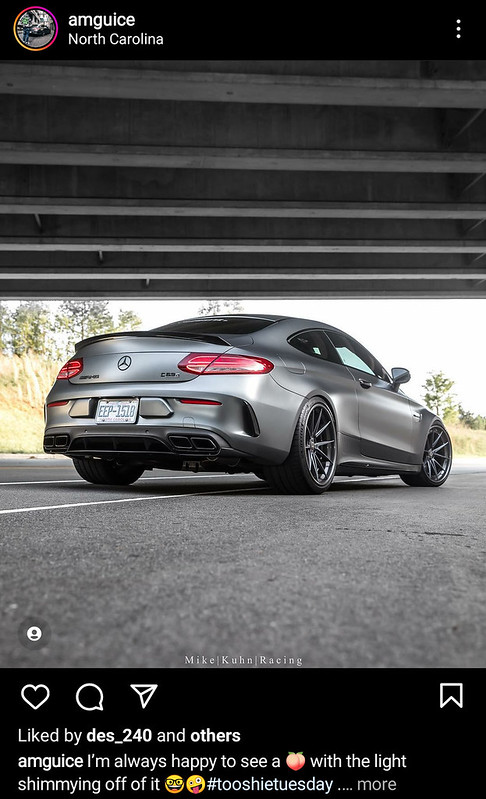
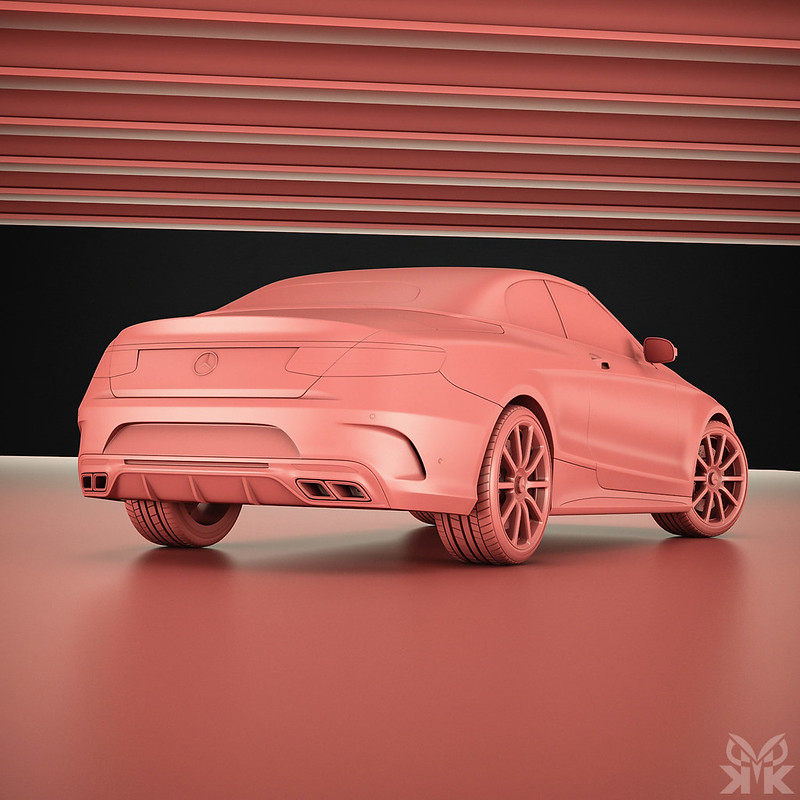
One of my favorite renders from this series is the rear-view perspective of the car. The mix of reflective and matte surfaces gives it a cinematic tone. Matching that kind of realism taught me a lot about lighting direction, rim highlights, and how reflections define a car’s shape.
The final render was the most satisfying — a complete side-by-side recreation of the original Instagram photo. Seeing the 3D version next to the real shot was surreal. It wasn’t about being identical, but about understanding light, form, and composition on a deeper level. That’s where this challenge really paid off.
This challenge was a perfect blend of creativity and discipline — a reminder that every great render starts with careful observation. Rebuilding real photographs in 3D taught me how light truly behaves, how materials respond, and how composition defines mood. I’ll definitely continue exploring this kind of project in the future — because every time I bridge the gap between photography and 3D art, I feel one step closer to mastering visual storytelling.
No Comments